AMI WQ-200 WALL BOX

WQ-200 as found
A couple of friends picked this up for me from a seller in New Jersey and shipped it to me.
It made it here, surviving without any damage. The condition is pretty much what it looks like in the photo above.
Evaluating it's condition
The chrome on the main cabinet is in very good condition, I think it's fine, with the exception of the top coin slot casting.
That casting has some small pitting, from a distance not very noticeable but I will have it re-done after I get the metal back for the continental 2.
The buttons have faded along with the paint on the front, this will be addressed.
A number of lights are burned out, or missing, they are type 47's , which are very common.
Two of those lights are located inside the casting where the coin slot is located.
The coin glass is in good shape, just needs cleaning.
The front plastic (not glass) which is what it should have I've been told, is in good shape, (will need polishing).
The title pages have some corrosion, and will be removed for cleaning and polishing.. more on this later.
The trim plate on the bottom has a few large gouges in it from the title pages adjusted incorrectly (too low)
All mechanical parts inside are there, that's a relief as parts for these wall boxes are pretty rare.
The only exception is that one button from another AMI model wall box replaced an original, seen on the right it's gray instead of white.
Moving ahead
Right off the bat there is an issue with the cabinet lock. I had a lot of trouble getting the wall box open to evaluate it.
I was beginning to think it had the wrong key, it finally opened. I pulled the lock out , and pulled it apart.
I think the casing had started to oxidize causing it to bind. I polished the interior of the shell casing and lightly oiled it.
It now works and was re-installed.
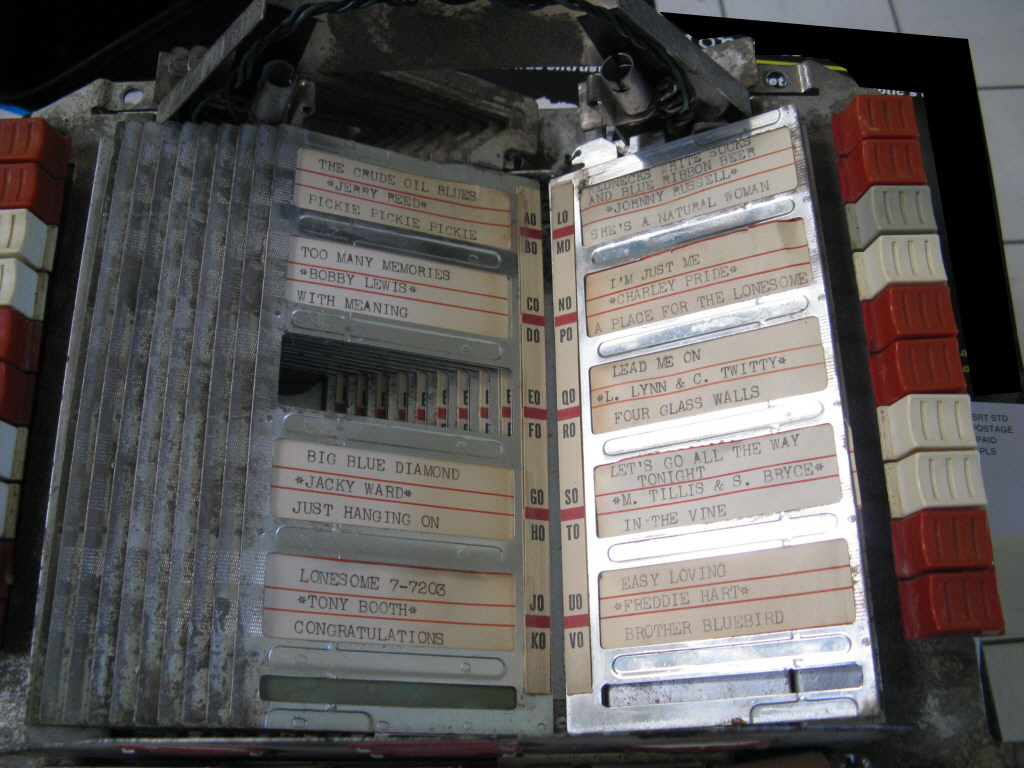
A few things about these pages, first, facing pages do not follow the the letter number combinations
Example -The first page on the left top title is A1 on the right L1, the next page flip A2 on the left and L2 on the right.
UPDATE: The lettering setup is for a Seeburg, not the Continental
The page's should be in sequence A1 on left then A11 on right and so on.
That small area below the last title strip on each page is for a category or saying label. I have restored the single type used
in this wallbox. However I have seen the wallbox came with a selection of different choices for this slot.
I am trying find originals and get scans of them.


The other thing about the title pages that is unusual is that the pages themselves are part of the selection process.
Each page position is detected by switches under the page bottoms, along with the buttons on the sides determine the correct record selection.
The entire title page assy is removed with a single latch located on the back bottom area and by tilting the bottom rearward..
Removing individual or multiple title pages can be very challenging, due to how they are mounted
The base plate trim on this wallbox has some deep grooves in the aluminum from the title page bottom pins.
(I have ordered a replacement from a vendor in the Netherlands)
It's important that plate be completely flat or the base plate will be damaged
If the plate is flat and the pages still touch the plate, the pages will have to be adjusted and moved up.
As explained before this can be a difficult job
On the
left, the front window has been polished
along with the cabinet, plus lettering has been repainted and
button revived
On the right as found
The image on top is the label in the wallbox at the back bottom as found.
Below it is a replica created to replace it, without the discoloration and damage.
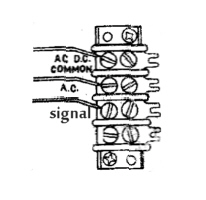

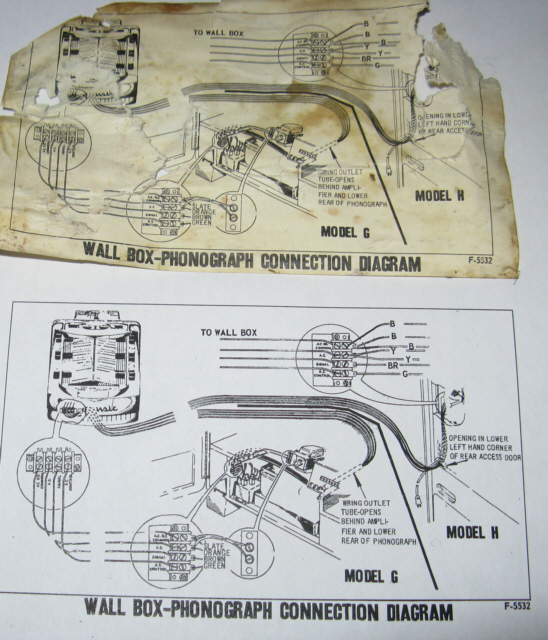
Above on the left is the orientation of a 3 wire connection on the CCC stepper in the Continental 2 on the right the connections to the WQ-200
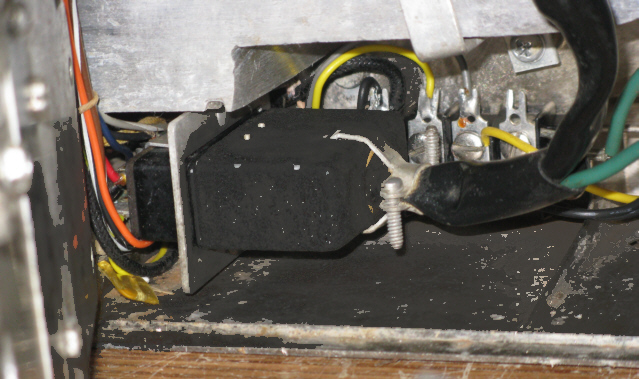
This is the Cinch Jones style plug used to connect the chassis to DC power and the above 3 wire connection.
This plug allows the mechanism to be removed from the wallbox cabinet.
I intend to make a detachable cable to connect the wallbox to the jukebox using the same style connectors.
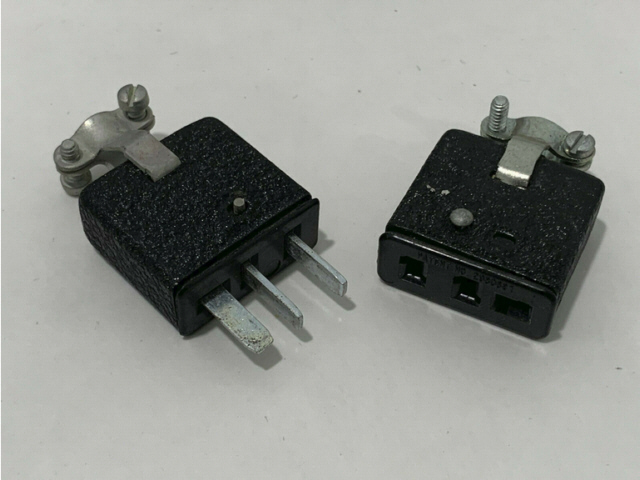
Cinch Jones S303-CTT P303-CCT
3 Pin Connector Set
I have purchased 2 sets of these Cinch Jones connectors to create the detachable cable for use with the wall box and the jukebox's CCC stepper.