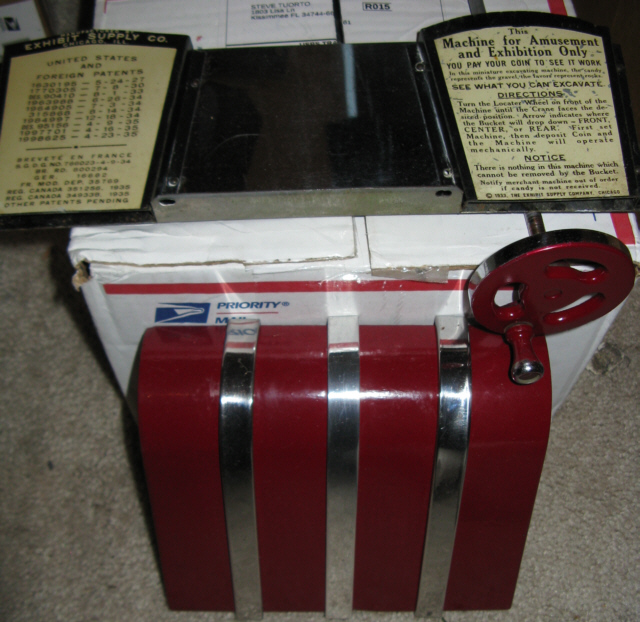
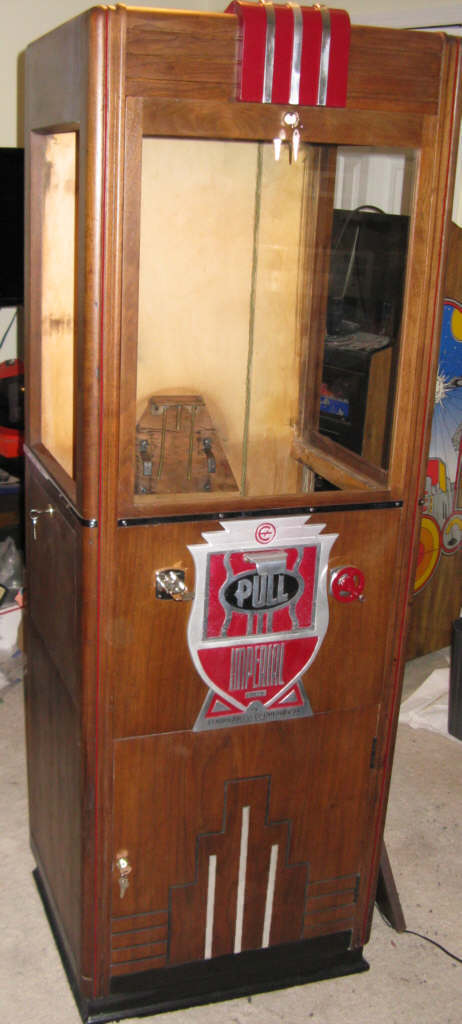
Here it is, a recent auction buy.
It's a 1936 Exhibit Supply Imperial Digger. More soon as the project begins.
It doesn't operate, electrically , however the crane boom does move manually left and right.
The first step will be to fully evaluate the machine.
It appears to be complete with the exception of it's missing feet, missing cash box and it has the wrong crane boom. ( a 50's version)
(Later to find out the entire crane assy is wrong for this model)
More photos will follow:
So I will be searching for the correct crane boom (more about this, learned later-see below), cash box,feet and ship castings.
PARTS NEEDED
FOUND ! Finally -A undamaged original Lattice style boom, Imperial feet, and Cashbox drawer
(A damaged boom has been found and is in the process of being repaired for use until a undamaged one can be found)
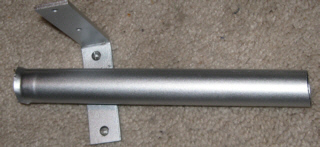
Here is what those missing original parts look like, this is the lattice style boom .
This style of crane boom was used in multiple models of early Exhibit Supply "Diggers"

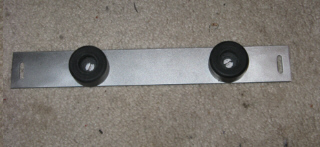
Here are the unique feet and coin drawer found only on a Exhibit Supply Imperial Digger
The feet are metal, the back feet appear to be a front foot cut in half. The coin drawer is 4.5"H x 5"W x 9"L
So if you have these things or know someone that may have spares, let me know.
Email address below
Turning Back The Clock
During disassembly of the
Digger, I found there was a major alteration
made to this Imperial. When the original lattice boom (included in the
storage
area) was damaged a complete non original crane assy was substituted.
Thankfully, the signs mounted to it, unique to imperial were retained.
It was not
visible
in the auction photos, the Digger's prize receptacle which should mimic
a
ship's
front bow was replaced with a later version assy like that found on the
1939
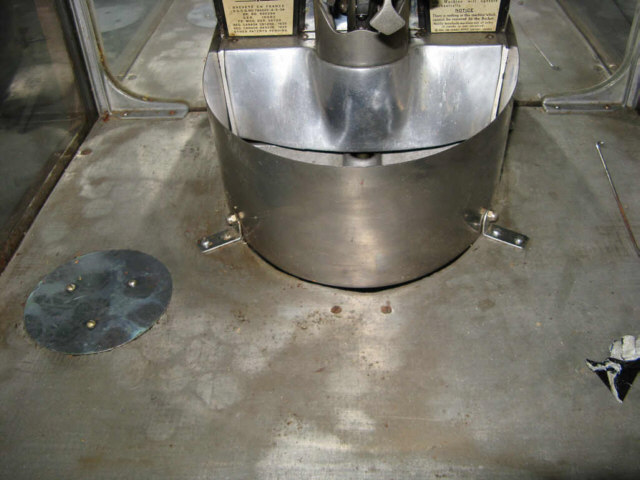
"Blue Streak" Digger. This later style crane was modified by the
factory to eliminate the 3 castings that made up the front of the
"ship". They altered one remaining casting of the assy and replaced
the ship castings with a
single piece of stainless steel, bent in an arc. The 2 screws used to
mount
and secure the separate front ship castings are still there in the
floor, but no
small casting. This indicates the original floor remains. This
was all
very
disappointing. I guess, lucky for me, Exhibit used this original ship
arrangement
in more than one of their early diggers and I was able to locate the
missing parts. Thanks Bob Lee! in the UK I have repaired the
altered floor, not
clear in the comparison photos below but the plywood and metal covering
were also cut to
match the new stainless shape. The floor covering originally
plated has
been replaced with polished aluminum.
Here is what the Exhibit Supply "Blue Streak" Digger looks like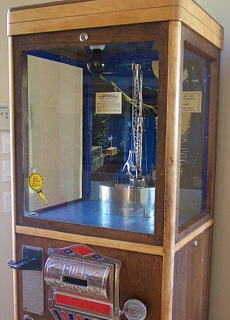
1939 Exhibit Blue Streak (stainless ship)
Additional Images added below
On the left as purchased, on the right what it looks like now, less the clean out hole cover and back casting with signs

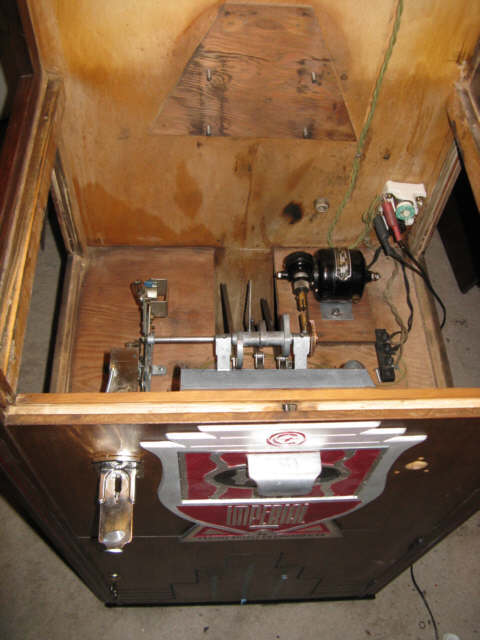
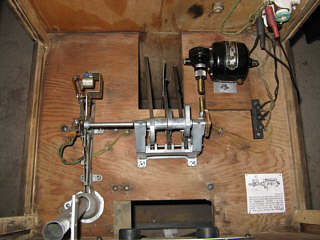
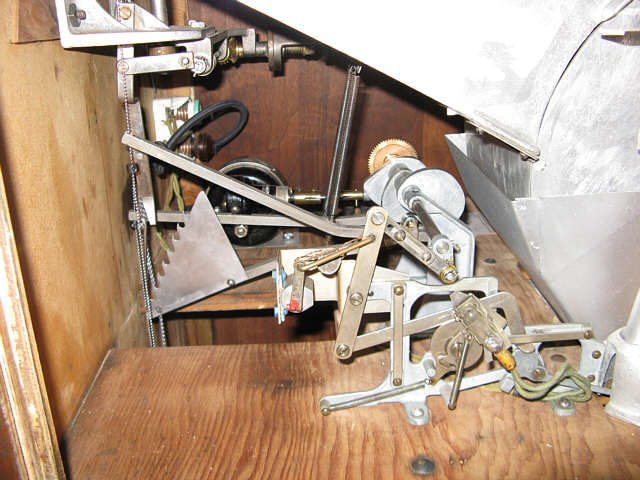
Good news, everything inside the cabinet appears original! (with exception of the locks) All crane mechanism parts and coin mechanism are intact.
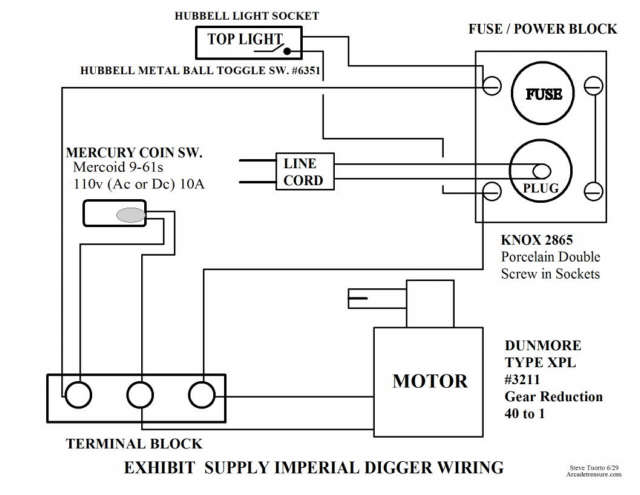
Before removing wiring connections and the wire itself I made the diagram below
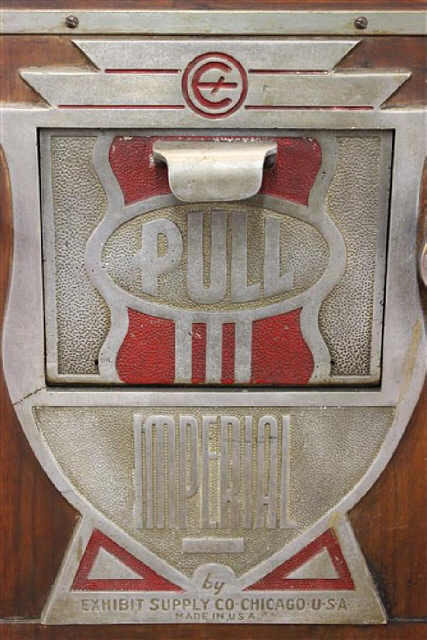
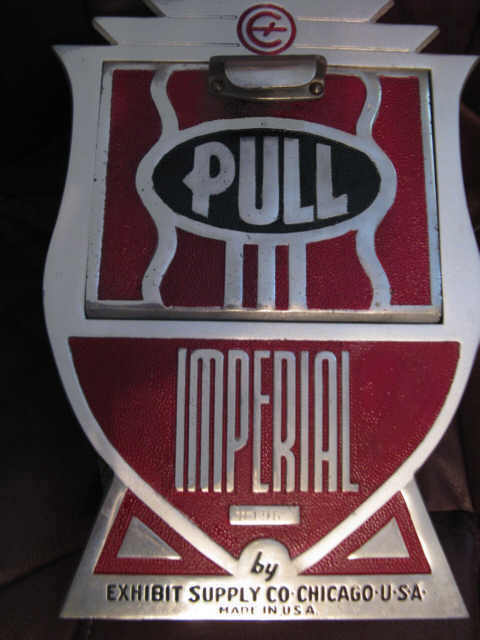
Here the front emblem and drawer front have been cleaned polished and painted.
Note: Though difficult to see in the painted photo, there are 2 holes on each side of the "Pull" marked "oil" this is to
lubricate the shaft the prize drawer pivots on
The rectangular raised area under the IMPERIAL letters is for the serial number of the game in this case- 8195
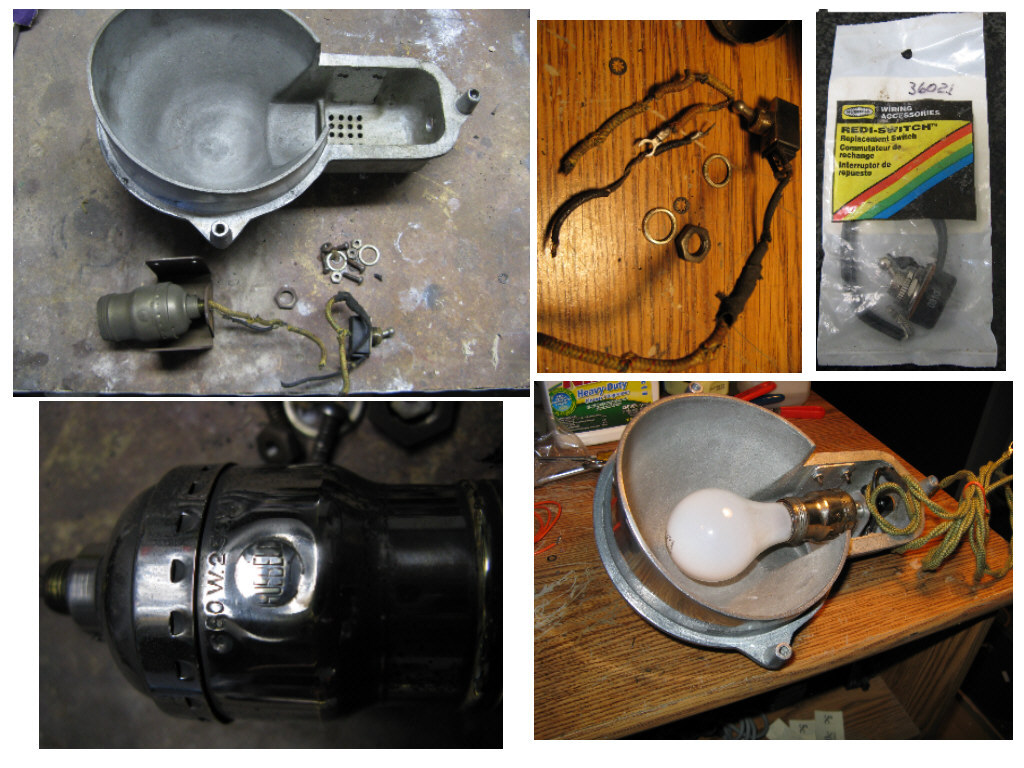
Below is the restoration of the top light assembly.
The original wire lead Hubbell switch was replaced with a new old stock replacement.
The original cloth wiring which was also badly cracking was replaced.
The original Hubbell brass light socket was cleaned and polished.
Finally the front area of the housing was polished to restore it's appearance.
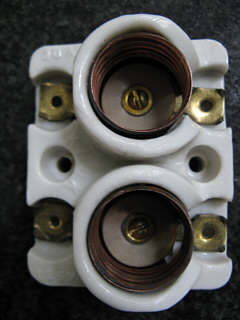
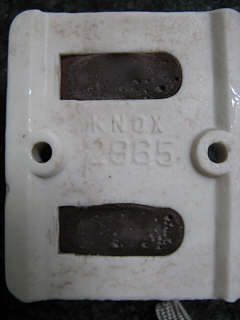
This serves as the power distribution block in the machine, located in the back right corner of the mechanism deck wall.
The top socket is for a fuse, the bottom uses a line cord adapter. That adapter will be where the doubled plugged line cord will plug in.
The cord exits the cabinet through a porcelain sleeve (not shown here)
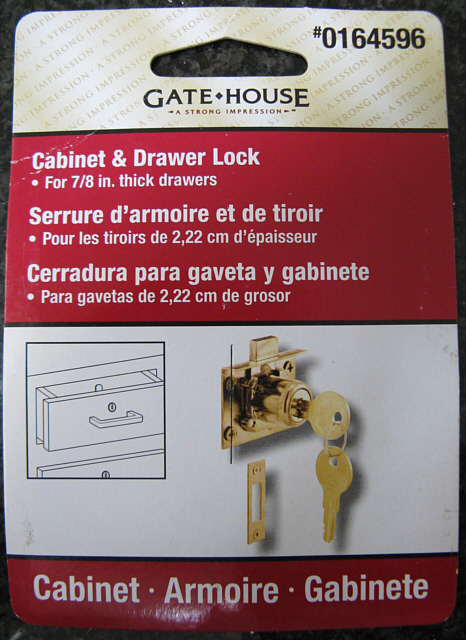
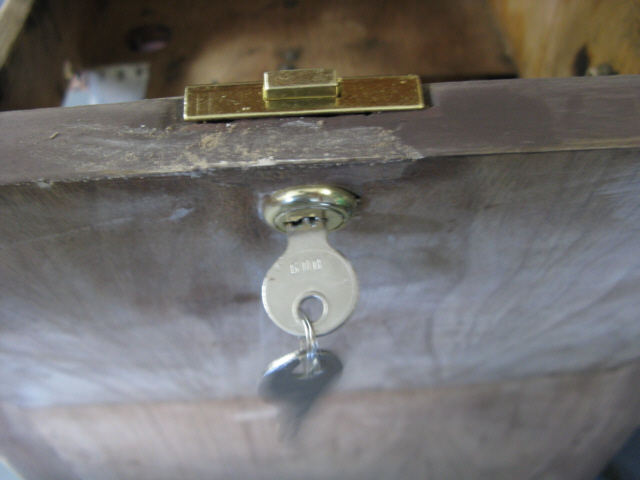
These are the locks I found that are a perfect match for the mortises in the doors. (after the doors were repaired)
Generally all the original cabinet locks for games are changed out by operators, usually when games are put on location for first time.
At this moment I don't know what the original lock types were.
These replacement locks can be found keyed alike, but are not sold that way. They are marked on the packages with the key #
In the case of the Imperial, it uses 4 locks on the cabinet, and I believe a 5th on the cashbox.
Here the front top trim restored , patent / instruction sign, stainless mirror and locator assy cleaned and polished
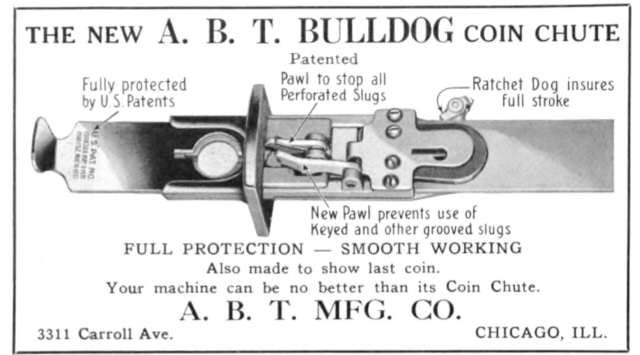
Restored coin chute
Restored prize door bumper assy.
These bumpers proved to be too thick
Thinner ones will be located
These bumpers proved to be too thick
Thinner ones will be located
Coin Mechanism, with Mercury power switch, Counter, and Operators tamper seal.
Shown here in the activated state. This is a fairly unique setup. The glass tube is filled with a small quantity of Mercury. The
coin activation arm is connected to a spring loaded mechanism that once activated tilts the mercury vile to the right as shown.
This completes the power circuit to the digger motor, which activates the mechanism sequence.
As part of that sequence this mechanism connected to the main cam assy will be reset. The coin arm shown down here after being struck by a coin
will be raised back into the standby position, once there the mercury switch, linked to that arm will move to the left turning the power off to the motor.
The counter located at the far left is mechanical, advanced by the coin mechanism going through the above sequence. To avoid tampering a "seal"
was placed parallel with the coin meter activated arm. Disabling the counter would require cutting that seal. That seal there to keep the location merchant honest.
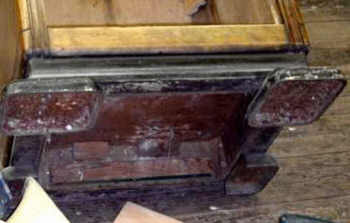
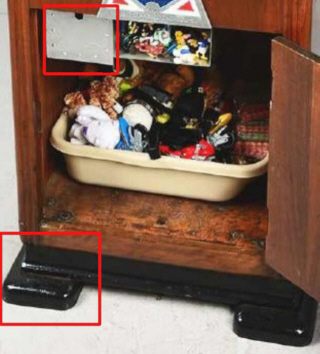
Here the major damage to the Imperial cabinet has been repaired. Normally this machine stands on 4 metal feet. They can be seen in a photo above from another
machine undergoing restoration by James Roller.
Because the feet had been removed the machine sat directly on the floor, hence the damage to the bottom.
I was told by James that those feet were needed when the machine was on location, because patrons would attempt to tip the machine to grab a prize they wanted.
The damaged plywood was carefully removed , new 7/8" plywood installed, bottom trim repaired.
The mountings for the feet are also restored, in case feet are ever found, or new ones created.
Here damage to the left side cabinet
door frame is being repaired, the door having been forced open at some
point

The cabinet has been stripped of it's finish on the left , all wiring and cabinet parts have been removed.
The side doors are on the cabinet, repairs on them being completed. All door mortises have been repaired to accept new locks. The cabinet is refinished, re-plated trim re-installed around the middle of the cabinet. This is the only known example, so far, of this model Digger with this added wrap around trim. The top decorative trim is back and new glass installed in the front door, replacing Lexan found in it when purchased. Burgundy pin stripping has been added to the front left and right columns to match the front burgundy painted parts which have been added in the last photo.
The bottom door trim has also been added back, the exterior cabinet now complete with exception of new side glass and a new back cabinet mirror.
Once the original mirror and side glass were illuminated with the cabinet's internal light too many flaws were discovered requiring their replacement.
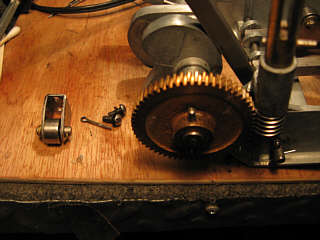
This includes every washer, screw, bolt and nut. Moving parts have been or will be lubricated. The electric motor and gearbox was disassembled
cleaned and re-luibricated before this stage. All wiring has be installed, including new cloth twisted wire to the top light fixture, with the exception of the special line cord. that will plug into the porcelain block, seen here with temporary power installed for testing. On the left a new old stock ABT coin slide, installed .
The restored front trim and prize drawer are installed. The last photo shows one of the cam assy rollers removed for cleaning and lubrication the cotter pin shown attaches to the arm the roller mounts to and is used by a spring connected to that arm so the roller will follow the cam lobe it rides on.
It's very close now, I am waiting for a few things I ordered , mostly hardware to complete the restoration.
All 3 pieces of glass have now been replaced, along with the back mirror which though it appeared in good shape turned out to be "foggy" lite by the games light.
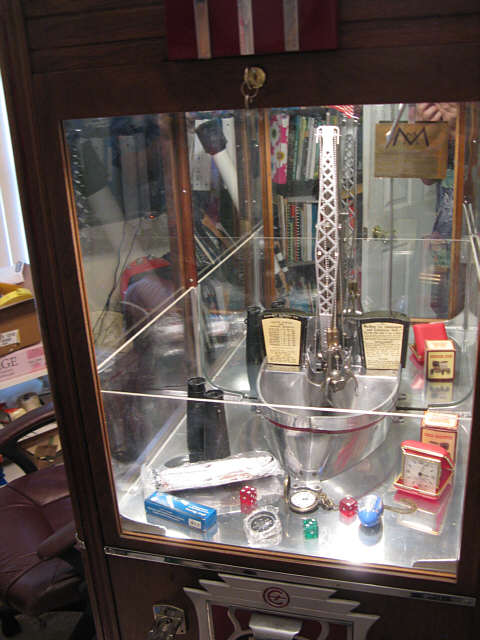


Done!
With the exception of missing original feet and coin box
(still looking for a perfect crane boom)
You'll notice on the left, in the last
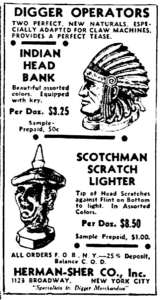
photo of the digger the indian head bank seen here
This is the coin slide used by
Exhibit
This Ad appeared in a late 30's
magazine. I was fortunate to find one of these banks!
If your seeing this and own an Imperial...email me.I am also looking for this 1936 Exhibit Supply Sales flyer that features the Imperial Digger on the cover - to purchase or even just a scan of it.

Email contact
webmaster@arcadetreasure.com

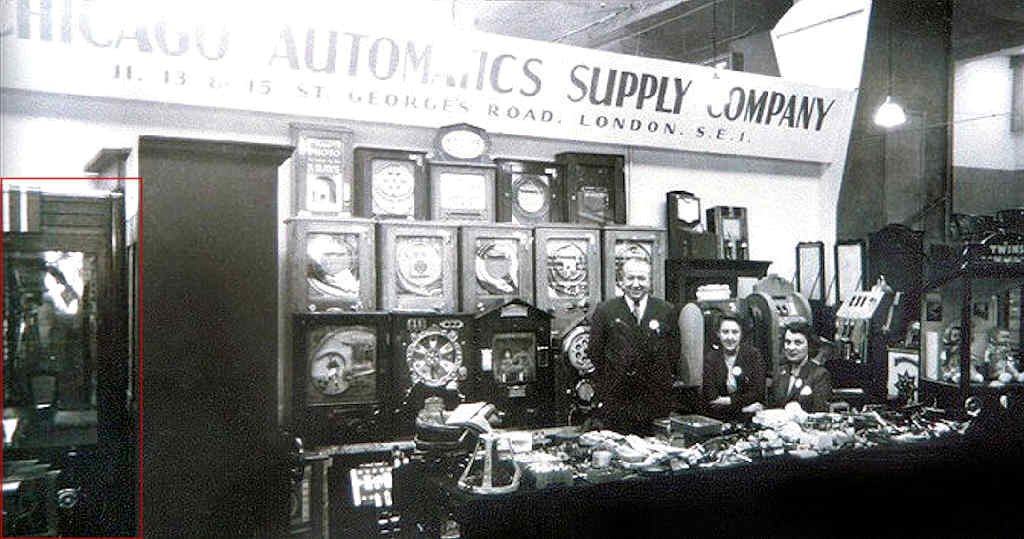
Here in the photo above, courtesy of a posting on pennymachines.co.uk is a Exhibit Supply Imperial offered for sale from a London supplier.