
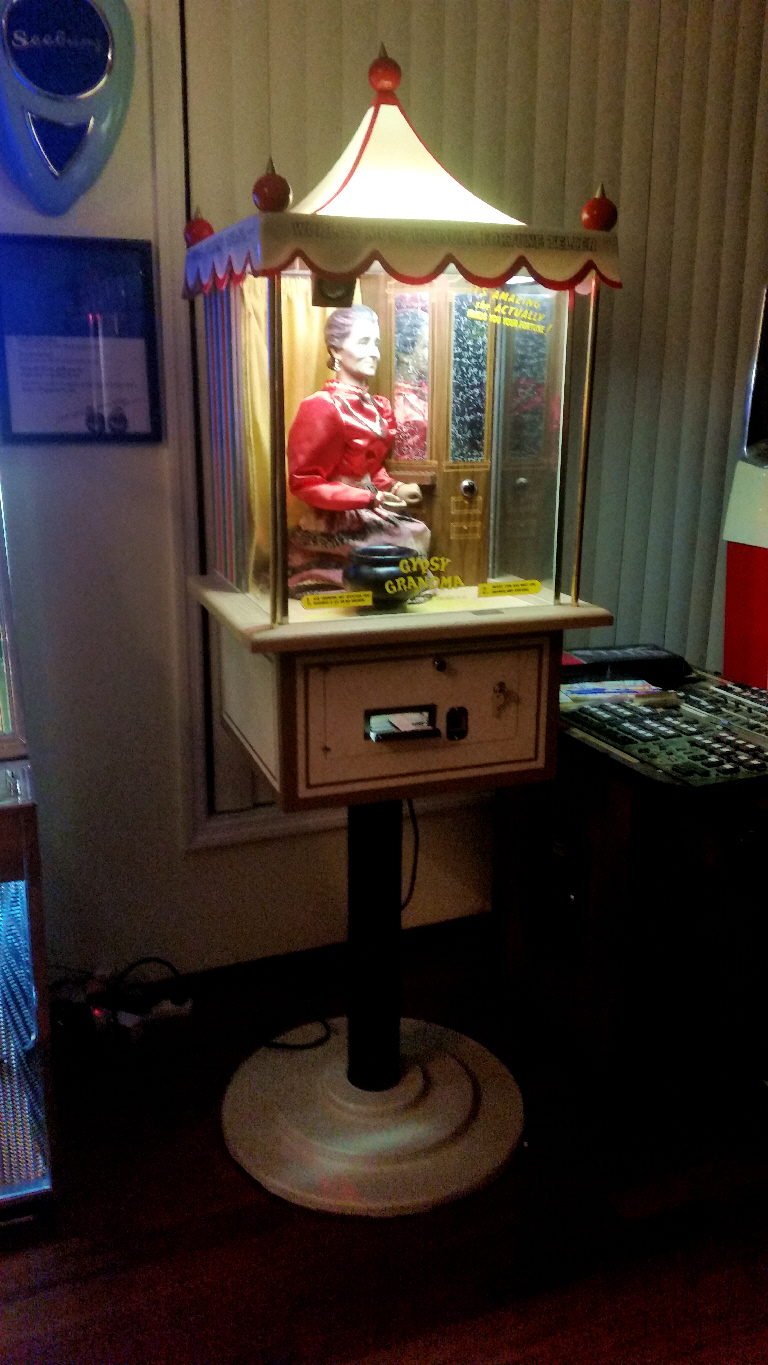
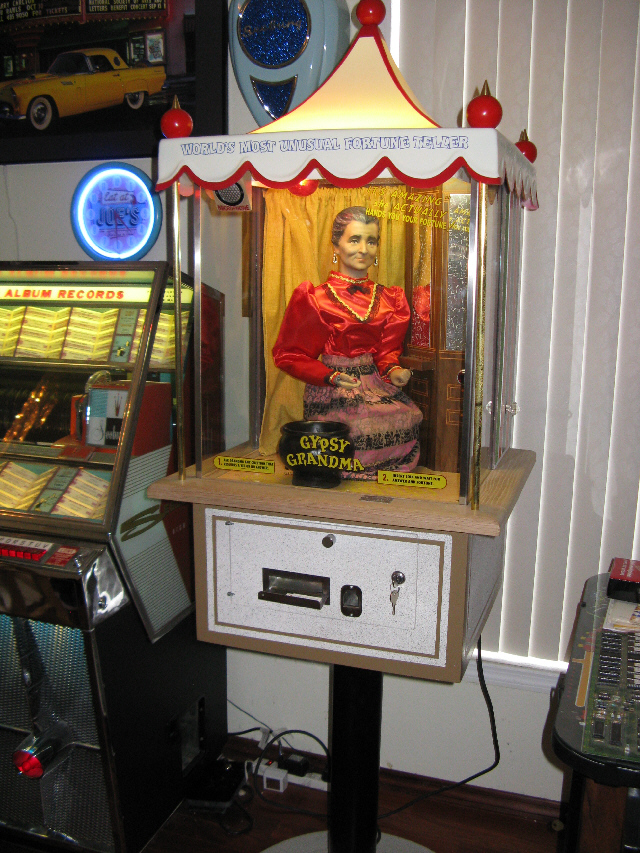
Well this is it.
An original Genco Grandma Fortune Teller was altered to become this sales display item.
This was not created by the factory, but done sometime later after the fortune teller was built and sold.
It was used to promote Rubbermaid products at homeware retailers and possibly industry shows.
Though an argument could be made to keep it as it was altered and restore it. I have chosen to restore it back
to it's original condition as sold and document the change made to it here. The most obvious change made, was to
marry it to a custom movable advertising platform it sits on.
It is part of this particular units history.
Here below are a few exerts from newspaper advertisements:
The Weirton Daily Times from Weirton, West Virginia on March 4, 1963 ..
The Cincinnati Enquirer from Cincinnati, Ohio on September 12, 1965 ...
Stainless steel, removable drip tray. SEE OUR "RUBBERMAID" GYPSY . . . learn what your " future holds, could be a free gift! She's located near the elevators. Mrs. Hazel Reik will demonstrate this rotisserie . . . sample some roast, taste the "barbecue" flavor! Small Appliances, Sixth Floor, also Tri-County and Western
I was unable to find a photo of it on location, so if you have one please send it to me or any other information about it's "life" before now.
Though it will be restored to it's original condition before it was altered, this is part of this one's unique history.
Along with the alteration to it's cabinet, customized fortune cards were dispensed, one will be displayed here later.
The Genco Gypsy
Grandma fortune teller is one of the most sophisticated animated
fortune tellers ever produced.
It is based
on an earlier turn of the century (patented 1896) Roover Brothers
fortune teller which was not electrified, requiring the patron
to pull a large handle on the right side. It had 7
movements versus the 8 that the Genco Gypsy Grandma has.
Here is the fortune
teller and patent drawing from 1896, it is very rare and valuable

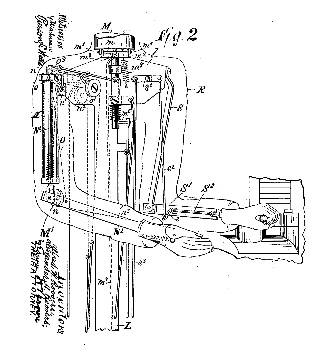
On the Genco Fortune
teller there is a
‘Microphone’ (looks only) on the upper left glass
area, on most of them..
A patron is suppose to ask Grandma a question that requires a Yes
or No
answer…
they can also just think it!. A dime is then inserted and Grandma wakes
up. As it starts Grandma appears to start breathing her chest moving in
and
out.
Her head moves and her hand moves. Her left hand moves over to a drawer
in
a cabinet located on that side, and opens it.
Now with her right hand she
reaches over and carefully actually selects a fortune card, gently
grabbing it
from the now open drawer.
Then Grandma brings the card over to a black caldron on
the floor in front of her and drops it in! There it falls through the
caldron and
arrives in a chute in the cabinet front door for the patron to take! Though that wasn't enough Grandma now blows
a kiss and goes to sleep waiting for the next question. This
animatronic like /
automaton figure is wonderful and considering it's based on a turn of
the
century design its amazing, This particular Genco was altered and used
to
enhance Rubbermaid sales at retailers and industry shows. The plan is
to
restore it back to when it left the factory in 1957 or at least as
close as
possible---stay tuned.

Here the original ad appearing in the May 18, 1957 Cash Box magazine Showing Genco's "Newest Sensation"
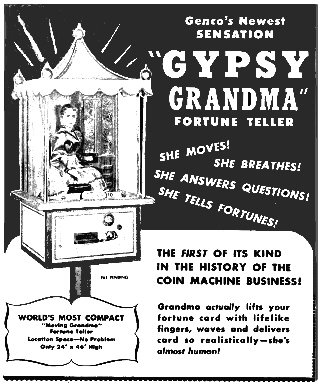
Here and on the original flyer it clearly indicates the width and height (only 46" high) Because the stand was optional.
You will notice the front door is different then most you will see. This because early machines used a different coin mechanism replaced by NRI mechs later.
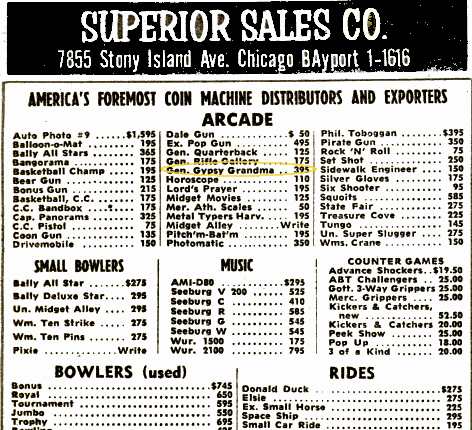
This Ad from 1958

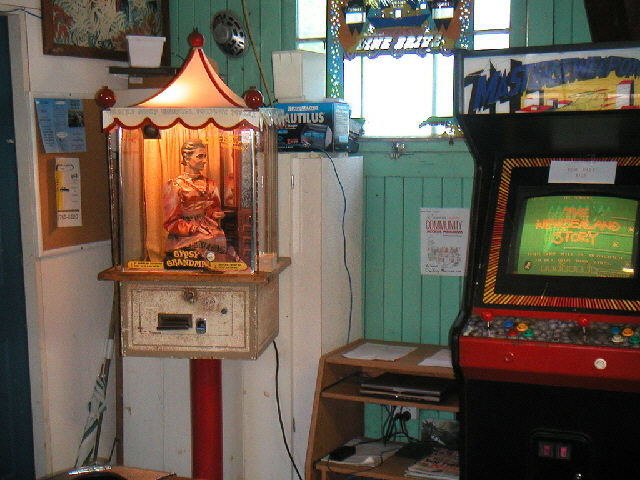
I am still looking for the original coin return knob, lever, card chute and coin box for this game
(Similar parts purchased or reproduced by me to complete the project)
A lot of the original door parts were replaced by a button to start the fortune teller as mentioned in the advertisement text above.
So, if you have a parts game, or loose spare parts around and have any of these things you don't need, contact me.
The process has begun to turn back the clock on the changes made to my Gypsy Grandma.
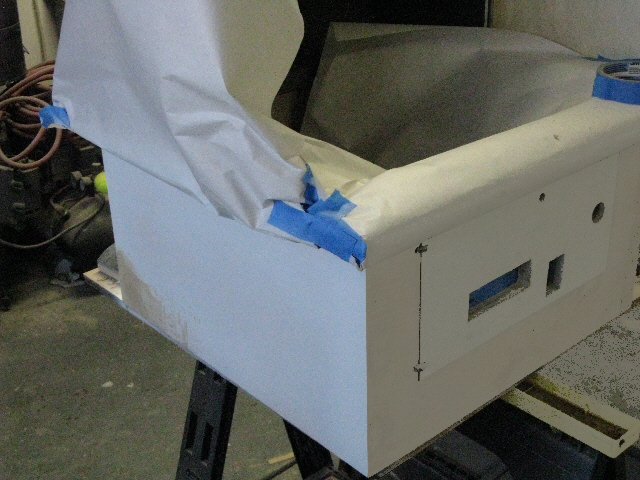
Though not seen in this photo the oak trim has been restored to the cabinet, as has the correct front door. Final imperfections are being addressed
Once the cabinet is primed, the stone effect finish will be applied.
After that chestnut lines will be added to the lower cabinet's three sides.
I did a test and have chosen not to add splatter paint to the finish. (I like the clean look of the base, no color was found on the original base when stripped)
In the above photo, the orange and green stripes have already been added to the sides, however they are covered to protect them from over spray.
Since I didn't have the original brass rods, it was suggested to use threaded rods through hollow 1/2" brass tubing, securing it on the oak side with a nut and washer.
Instead I came up with a slightly different solution. It will appear as it did originally.
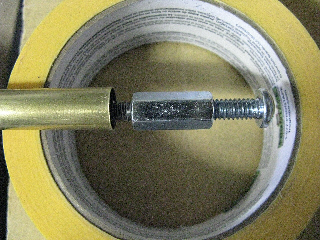
The screw comes up through the oak into the coupler, which the threaded rod is attached to.


Here is the unrestored original pedestal base I purchased to the left and on the right the restored pedestal base with pole.
Rubber edging has been added to both pole ends.
Note: this base is different than most you will see, it is threaded for 1 1/4" pipe and the edge is scalloped not flat, plus no color was found on it.
I used 4" truck exhaust pipe to cover the threaded pipe which attaches to a flange on the cabinet bottom.
This is a very early base for the fortune teller. The fact that no color was found on the game cabinet, it seems to be what would have been sold for it.
I have chosen to put the color stripes on the sides along with the lines on the lower cabinet area.
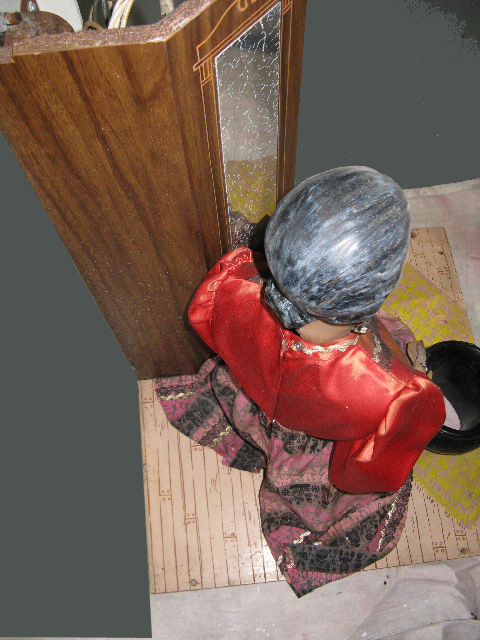

This is the character platform removed from the cabinet. It is secured to the cabinet mounting strips with 3 screws,
also a bracket in the corner cabinet. The wiring harness is connected with a 8 pin plug above the fuse block near the coin counter.
This harness supplies power and control to the character relay, lights, and motor.
The low voltage circuit is located in the bottom cabinet, supplying 6 and 30 volts.
Assuming the lighting board has not been permanently attached, removing it by unplugging the 3 pin connector and starter,
located in the top of the corner cabinet makes it much easier to lift the character board out and re-install.
Though most restorations of this fortune teller have reproduction dresses, normally with a gold top, this is an original, obviously not gold.
Unfortunately the front of the top is not in very good condition, as shown here, badly faded and it will have to be re-done.

This is the detail of the lace and ric rac used on the dress.

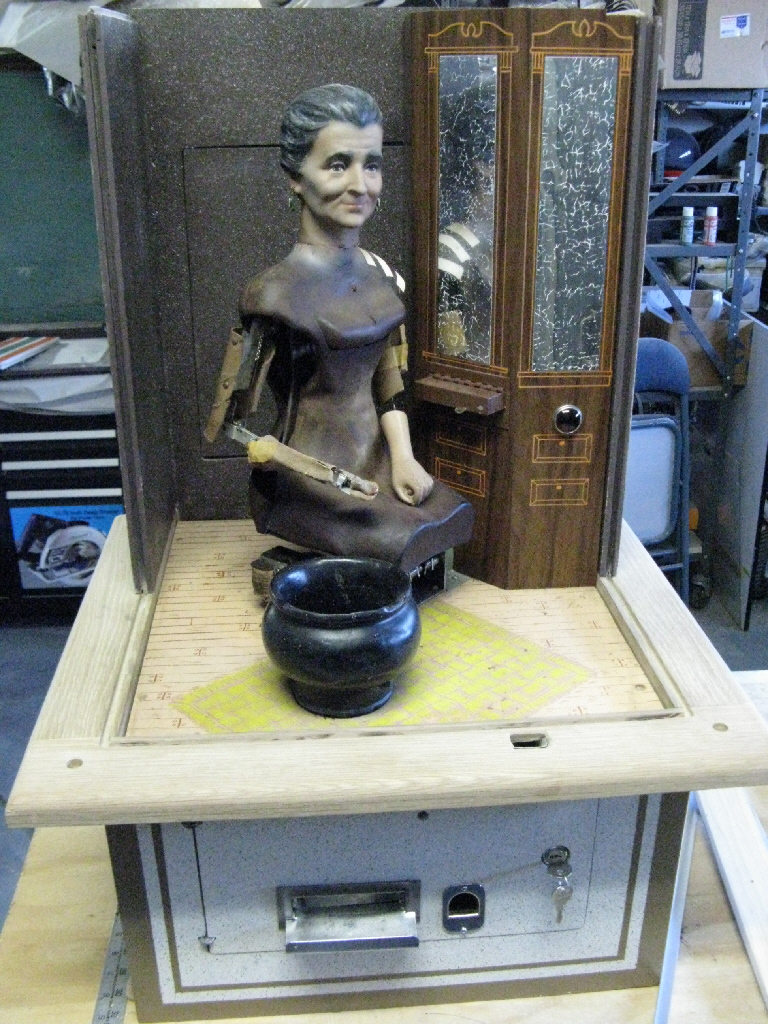
Getting there...

These are the original cameo earrings for the Gypsy Grandma
The stones in the settings are 3mm. The top stone on the left was missing and was replaced
Note: there is a left and a right
The cabinet is in pretty good shape now, moving on to the rest.
The original coin mechanism is a series 600 National Rejectors Inc. 10 cent mechanism as shown below.
It has a unique feature when implemented allowing it to not accept dimes if the game power is off or it's out of cards.
I have restored the function but found the coin mechanism considers modern dimes equal to slugs and rejects them.
However I did test and adjust it with silver dimes and it works. (more on how this works later) The game and door must be level.
So, I have adjusted it to accept all dimes effectively disabling the functions I just mentioned.
Most likely all Gypsy Grandmas have this function disabled at this point. Either by removing the "Door Coil" as
designated on the schematic for the fortune teller, or by just disconnecting it, and adjusting the coin mech to accept all dimes..
The "Magnet" in the drawing is the electromagnet on the coin mechanisms mounting bracket , again, called "door coil" on the schematic. powered by the 30v source.


The plan, remove the skirt portion and repair the top, actually re-create it.
The first step was find materials that are the same or as close as possible to the originals used.
I purchased a few different sample red satins, after searching. The one shown below has a heavy backing as the original and is a very close match to the color.
Next, came finding new Ric Rac and lace.
On my dress the Ric Rac (metal trim) looked to silver versus gold. All the gold dresses have gold.
Once the original dress was disassembled and the back side of the trim could be seen, it originally was gold!
I was able to find the exact Ric Rac from a supplier in the UK. However the lace was not able to be found.
So....very carefully the original lace was removed from the dress and re-used.
Here is the start of the repair
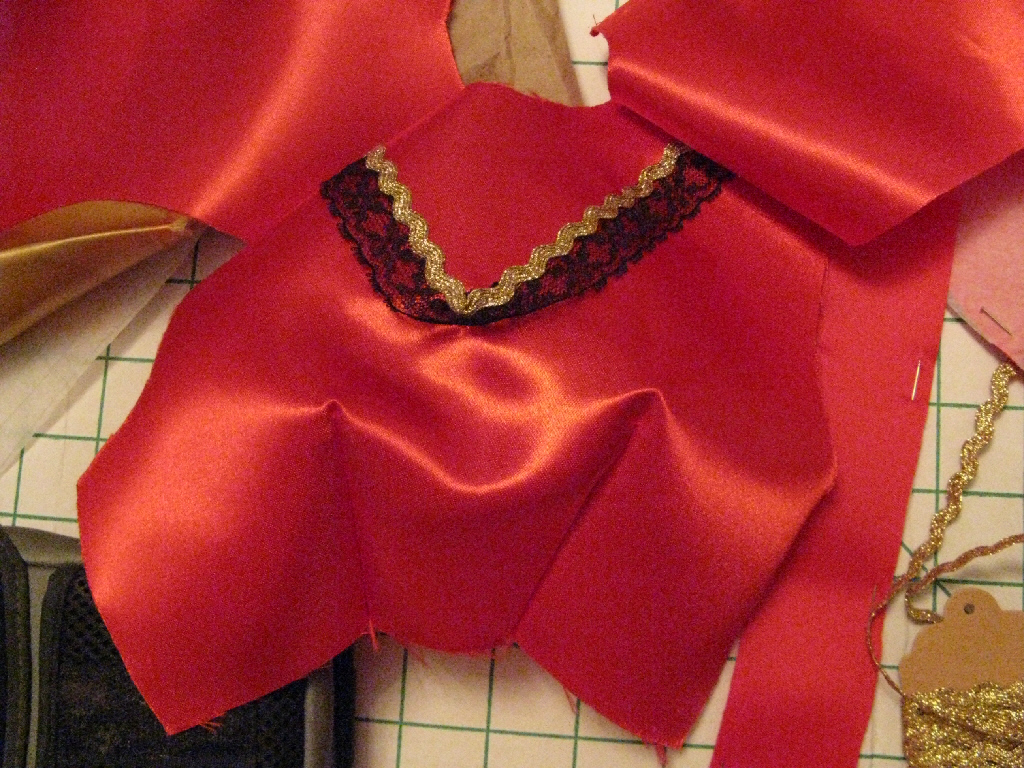
The lighting effects the color of the top, under normal lighting the color is more like the one below.
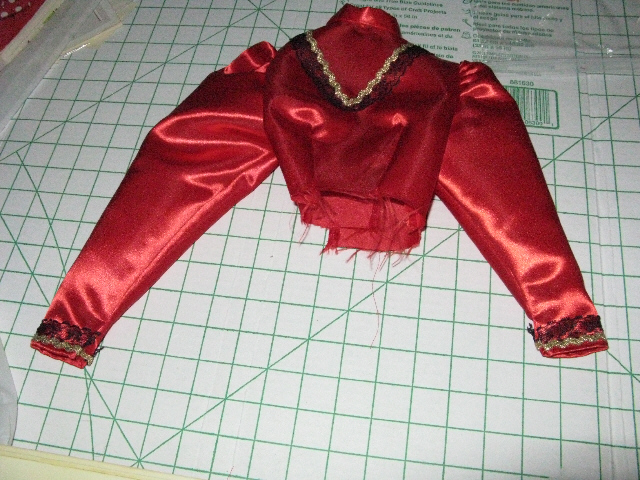
Here it's almost done , once finished it will be re-joined to the original skirt , which has been repaired.
You'll notice the collar is not finished , nor is the bow in place yet.
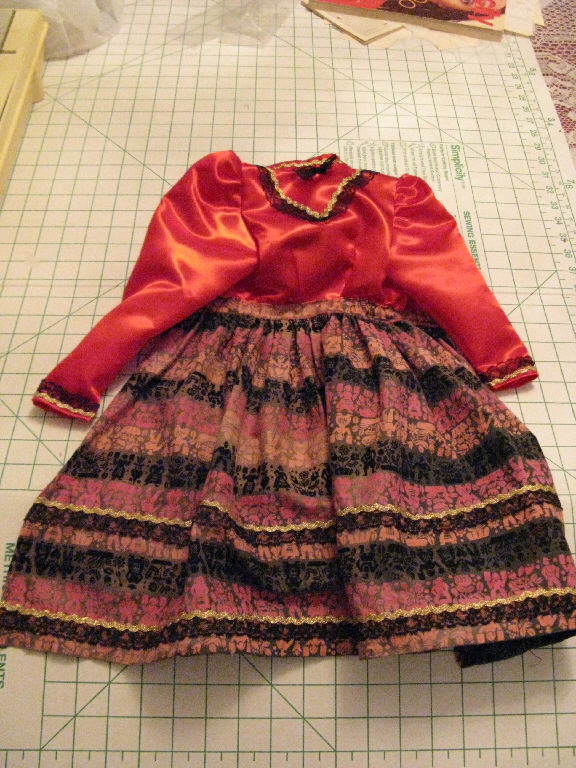
Here both halves of the dress have been joined back together.
On the dress bottom, the original Ric Rac and lace was carefully removed, new original Ric Rac was put back with the original lace.
I am fortunate that the skirt portion was in fairly good shape. There were a few small holes, these were repaired using a special fabric adhesive.
Those repairs will arrest and further deterioration in those areas.
The choice was made not to use reproduced fabric but to save the original and repair it.
I have seen some of the skirts on these dresses just fell apart.
I need to thank my Wife and Daughter for their help in completing this part of the project. Though I have a lot of skills, sewing is not one of them.
I did however make the pattern my wife used. The blouse , not a simple thing to make as each arm is different....look at the photos.
That is not a mistake. The arm that picks up the card is longer, the arm that opens the draw shorter
While I'm thanking those that have helped make this happen ....thanks goes out to Joe K. in NY for all your help, without it, restoring this back to it's original state
would not have been possible. Joe can supply you with reproduction dresses and front glass if you need them. Email me for contact information.
It's finally back together. I have some more things I want to do with it....but that will be in the future,
Stay tuned.

More photos and info later.
Email Steve

Return To Project Page